Sawmill Gravy
Ingredients
Equipment
Method
- Heat a 10-inch cast iron skillet over medium heat.
- Add breakfast sausage to the skillet.
- If using patties, sear both sides then break into crumbles.
- Cook the sausage until fully cooked and browned.
- Add the butter and let the moisture sizzle off.
- Add the flour and stir slowly for 4 minutes to cook the roux.
- Add all the milk at once and whisk quickly to combine the roux and milk.
- Add salt and pepper.
- Continue stirring until the gravy starts to bubble and simmer.
- Let it simmer for 5 minutes, stirring occasionally, until thickened.
- Remove from heat.
- Serve in the skillet or transfer to a stoneware dish to hold heat on the table.
Notes
Tried this recipe?
Let us know how it was!Why This Recipe Works
Sawmill gravy earned its name in logging camps where workers needed calorie-dense breakfasts before heading into the woods. It's built on rendered sausage fat, flour, and milk - ingredients that were cheap, shelf-stable, and filling. Today, it's the gravy you make when you want more than just white gravy over your biscuits. As Victor puts it, sawmill gravy has more flavor than plain white gravy, and quality sausage patties crumbled up give it that deep flavor that makes the difference between adequate breakfast and the kind you remember.
This isn't a recipe that benefits from shortcuts or "healthier" substitutions. It works because pork fat creates flavor, a proper roux provides structure, and whole milk gives you the creamy texture that defines good gravy. Master this technique once, and you'll never need to reference the recipe again.
The Technique That Matters
Sawmill gravy is fundamentally a white gravy built on a blonde roux. You're creating an emulsion where flour-coated fat particles suspend in milk, thickening it into a gravy that coats rather than runs. The key is controlling your roux and managing your milk temperature.
What You're Actually Doing
First, you're rendering fat from breakfast sausage, which provides both the cooking medium and the base flavor. The crumbled sausage stays in the pan - this isn't about extracting fat and discarding solids. You're building layers. Then you're adding butter to bring the total fat content up to what you need for a proper roux. Four tablespoons each of fat and flour creates the structure for three cups of milk. That ratio matters. Too little flour and your gravy stays thin. Too much and it gets gluey.
The roux cooks just until the raw flour taste disappears - maybe two minutes at medium heat. You're not browning it; you want it blonde, almost white. Then comes the critical move: adding milk gradually while whisking constantly. This prevents lumps by ensuring every bit of roux gets hydrated evenly. The gravy will look thin at first, then suddenly thicken as it comes to a gentle simmer and the starches gelatinize. That transformation is what you're waiting for.
Selecting and Preparing Breakfast Sausage
The sausage you choose sets the flavor foundation for the entire gravy. You want bulk breakfast sausage with enough fat content to render properly - usually around 20-30% fat. This is where quality matters. Well-seasoned sausage patties crumbled up bring sage, black pepper, and pork flavor that cheap tube sausage just doesn't deliver.
What to Look For
- Fat content: Don't buy "reduced fat" sausage - you need that fat for both flavor and function in the roux
- Seasoning level: Choose a well-seasoned breakfast sausage with visible sage and black pepper already in the mix
- Form factor: Bulk sausage works fine, but quality sausage patties crumbled after cooking often have better seasoning and texture than cheap ground options
Common Mistakes and How to Avoid Them
Most sawmill gravy failures come down to roux problems or temperature management. Both are easily fixed once you know what you're looking for.
Problems and Solutions
- Problem: Lumpy gravy that won't smooth out → Solution: Add milk gradually while whisking constantly; if lumps form, strain them out or use an immersion blender briefly
- Problem: Greasy, broken gravy with fat pooling on top → Solution: You didn't cook the roux long enough to absorb the fat, or you added milk too quickly before the flour could hydrate properly
- Problem: Thin, watery gravy that won't thicken → Solution: Let it simmer longer to activate the starch, or your flour-to-fat ratio was off - measure both carefully next time
- Problem: Gravy becomes too thick as it sits → Solution: This is normal as it cools; thin it with a splash of milk when reheating and whisk until smooth again
Timing and Doneness
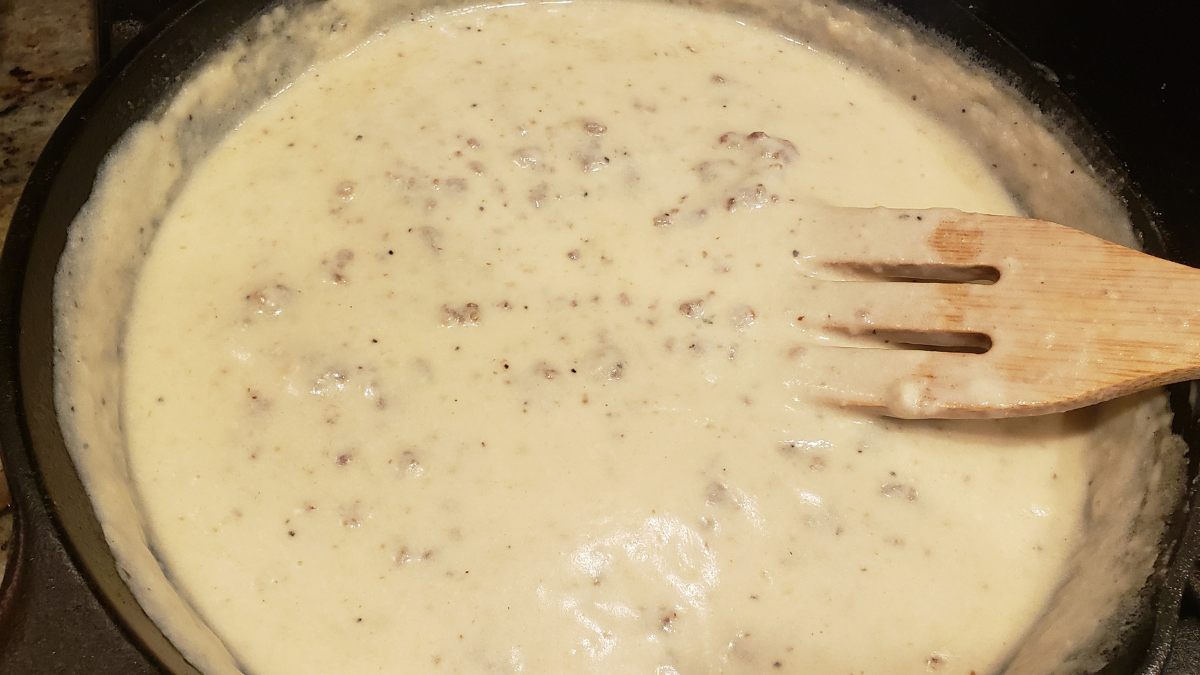
Sawmill gravy is done when it's thick enough to coat the back of a spoon but still pourable. It should have a silky, creamy texture without any raw flour taste. The total cooking time after adding milk is usually 5-7 minutes of gentle simmering - just enough for the flour to fully hydrate and the flavors to marry.
What Done Looks Like
The gravy will bubble gently and thicken noticeably as it simmers. Draw a line through it with your whisk - if the line holds for a second before flowing back together, you're there. It should be heavily peppered, visibly speckled with black, and taste rich without being heavy. The sausage pieces should be evenly distributed and cooked through, adding texture to every spoonful.
Variations and Serving Suggestions
Traditional sawmill gravy doesn't need much modification - it's already doing exactly what it's supposed to do. But you can adjust the pepper level and add herbs if you want to make it your own.
Make It Your Own
- Seasoning variations: Add fresh thyme or sage to complement the sausage; increase black pepper significantly for more heat; a pinch of cayenne adds depth without obvious spice
- Dietary modifications: Turkey breakfast sausage works but produces a lighter-colored, less rich gravy; full-fat milk is non-negotiable for proper texture and mouthfeel
- Serving ideas: Over split biscuits for traditional breakfast; alongside fried eggs and hash browns; over chicken-fried steak for dinner; as a topping for breakfast casseroles
Why It's Worth Making
Sawmill gravy is one of those foundational recipes that teaches you how roux works, how to build flavor in layers, and why technique matters even in simple dishes. Once you've made it a few times, it becomes second nature - the kind of recipe you make on weekend mornings without thinking, turning out perfect gravy while the biscuits bake. It's comfort food that doesn't apologize for what it is: rich, satisfying, and exactly what breakfast needs to be sometimes. Victor's right - this is the best over biscuits, and once you taste the difference that quality sausage makes, you'll understand why it's worth doing properly.
Recipe
Sawmill Gravy
Ingredients
Equipment
Method
- Heat a 10-inch cast iron skillet over medium heat.
- Add breakfast sausage to the skillet.
- If using patties, sear both sides then break into crumbles.
- Cook the sausage until fully cooked and browned.
- Add the butter and let the moisture sizzle off.
- Add the flour and stir slowly for 4 minutes to cook the roux.
- Add all the milk at once and whisk quickly to combine the roux and milk.
- Add salt and pepper.
- Continue stirring until the gravy starts to bubble and simmer.
- Let it simmer for 5 minutes, stirring occasionally, until thickened.
- Remove from heat.
- Serve in the skillet or transfer to a stoneware dish to hold heat on the table.


Was this helpful?
You must be logged in to post a comment.