I cooked my first meal in a cast iron pan when I was 10 years old. Pancakes. They were black. The pan was so hot that my first few batches went straight in the trash until my mother finally got me to understand that cast iron gets too hot, too fast, if you're not paying attention. I asked her to teach me to cook, and that pan was where it started.
I still cook in that pan today - at least once a week. I've refinished it, re-seasoned it more times than I can count, and it performs better now than it did 49 years ago. That's not nostalgia talking. That's what cast iron does when you understand how it works.
Cast iron is the one piece of equipment that gets better every time you use it. No nonstick coating to baby. No warping. No planned obsolescence. A well-seasoned cast iron skillet does everything a $200 pan does - sear, bake, braise, fry - and it'll outlive you. But most people either treat it like a museum piece or give up on it because they got bad advice about seasoning, cleaning, and heat management.
This page is the complete system. How to season cast iron properly (and what fats to use - the internet gets this wrong). How to actually cook in it without food sticking. How to clean it without destroying the finish. How to troubleshoot every common problem. And the recipes that make cast iron earn its permanent spot on your stovetop.
The Four Best Cast Iron Recipes to Start With
If you just bought your first cast iron skillet, don't start with eggs. Start with confidence builders - recipes where the cast iron does the heavy lifting and the margin for error is wide. These four build your seasoning while they build your skill.
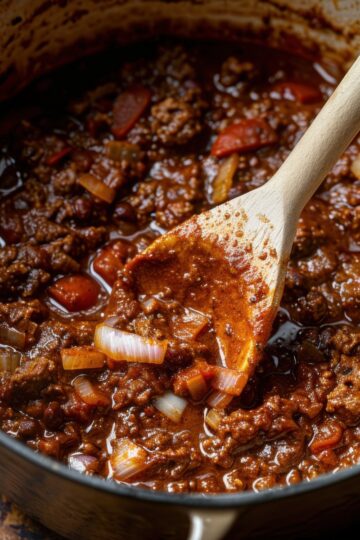
Chili Beef. Taco Meat. Steaks. Pan Roasted Chicken Thighs - once you've got some seasoning established. Cast iron handles all four beautifully, and none of them require precision technique. Cook these on repeat and your pan's finish will develop fast.
And here's the fastest way to build a world-class seasoning: fry potatoes in beef tallow. Over and over. Who's going to complain about that? Potatoes fried in beef tallow are delicious, and the repeated frying puts your cast iron through heating and cooling cycles with saturated fat absorbing into the surface. That's a master class in seasoning disguised as a side dish.


Why Cast Iron Belongs in a Batch Cooking Kitchen
Cast iron isn't just a weekend warrior pan. It's a batch cooking workhorse. Here's why it earns permanent counter space in a system-driven kitchen:
Heat retention changes the game. Cast iron holds heat longer and more evenly than any other pan material. When you're searing six pounds of chicken thighs in batches, the pan stays hot between rounds instead of crashing every time cold protein hits the surface. That means consistent browning without babysitting burner dials.
Oven-to-stovetop versatility. Start a batch of ground beef on the stovetop, finish it in the oven. Make cornbread in the same pan you seared pork chops in. No switching vessels, no extra dishes. In a batch cooking session where you're running three things simultaneously, that flexibility matters.
The seasoning compounds. Every batch cook adds another layer. A pan that's been through thirty batches of ground beef, a dozen cornbreads, and weekly vegetable roasts develops a cooking surface that rivals any nonstick - without the chemical coating or the replacement cycle.
It scales. A 10-inch skillet handles a weeknight dinner. A 12-inch handles a batch cook. Need to serve a crowd? Cook in cast iron for the sear and quality, then transfer to hotel pans for holding and serving. Same technique, different scale. Learn one, you've learned them all.
Understanding Cast Iron Heat - The Large Ship Analogy
This is where most people go wrong with cast iron, and it's the single biggest reason food burns or sticks.
Cast iron is like a large ship. It takes a minute to get up to temperature, and it's slow to react when you change course. When you turn the heat down, the pan doesn't cool down immediately - it actually continues getting hotter before the thermal curve catches up and starts dropping. That carryover is what burns butter in 20 seconds, turns eggs into something that looks like they were dragged through dirt, and makes people think cast iron is difficult.
It's not difficult. It's different. Here's the system:
Medium heat for short cooks - burgers, quick sears, reheating batch components. The pan reaches full working temperature in 3-5 minutes and stays there.
Low to medium heat for longer cooks or delicate items - eggs, pancakes, French toast. The continued heat from the cast iron keeps things plenty hot. Your instinct will scream to turn it up. Resist. Low-medium on cast iron runs hotter than you think.
Medium-high heat for fast sears - steaks, blackening chicken. Get the sear, then pull or transfer. You're not living at this temperature - you're visiting. My wife's favorite cast iron meal is a ribeye - hot sear on the stovetop, then straight under the broiler to finish. That's the med-high technique in action: intense heat, short duration, then out.
Never crank to high and walk away. That's how you get burned butter, scorched food, and the mistaken belief that cast iron doesn't work. You're fighting the carryover, and the carryover always wins.
Cooking in Cast Iron - Heat Management, Fat Selection, and the Rules That Actually Matter
Seasoning Your Cast Iron - The Real Method
Forget the mythology. Seasoning cast iron is polymer chemistry: fat bonds to iron at high heat and creates a smooth, nonstick surface that improves with use. But the fat you choose matters more than most people realize.
The fat hierarchy (in order of preference):
- Beef tallow (rendered from organ fat, around the kidneys) - the supreme choice. When you season with tallow, you get a coating that feels like a thin plasticized layer on the surface. Hard, smooth, and genuinely nonstick.
- Beef fat (rendered from muscle fat) - more readily available than tallow. You're probably already producing this when you batch cook ground beef. Save it instead of discarding it.
- Lard (rendered pork fat) - another saturated fat that performs well. Solid at room temperature, seasons cleanly.
- Avocado oil - a last resort, not a first choice. High smoke point, works adequately, but doesn't build the same quality of finish as animal fats.
- Grapeseed oil - acceptable if nothing else is available.
What to never use: Seed oils and vegetable oils. They create a gummy, sticky residue on the surface that does not polymerize into the hard finish you want. If your cast iron has ever felt tacky or developed a weird buildup, seed oils are almost certainly the reason. Coconut oil leaves a waxy film when cold. Olive oil smokes too early and gums up. Don't use any of them for seasoning.
The oven method:
- Preheat oven to 450-500°F.
- Wash the pan with warm water and a drop of Dawn. Rinse clean - don't let it sit wet.
- Dry immediately, then heat the pan on the stovetop until it's too hot to touch.
- Lightly coat the entire hot pan with your chosen fat - cooking surface, handle, bottom, sides. Use a thick fold of paper towels to protect your fingers. The fat gets searing hot in seconds.
- Place the coated pan in the oven for 1 hour.
- Turn oven off, let the pan cool to room temperature inside.
- Repeat steps 3-6 four more times. This can be done over several days - it doesn't need to happen in one session.
The stovetop method (daily maintenance):
After washing, put the pan back on the stove over high heat to dry completely and get really hot. Add a small amount of fat (1 teaspoon to 1 tablespoon depending on pan size) and wipe the entire surface with a thick fold of paper towels. When completely coated, leave on the heat until the fat starts to smoke, then kill the heat and let it cool naturally on the stovetop.
This is my routine, and it's the routine I require of my family if they use my cast iron. Reseasoning happens after about 80% of uses. Occasionally I'll skip it if the pan seems well-seasoned enough after washing, but the habit is what keeps the finish built up.

How to Season Cast Iron With Beef Tallow - The Only Method That Works
The Soap Myth - And Why I Use Dawn on Purpose
There's a persistent myth that you should never use soap on cast iron. Here's the actual history: soaps made 30-50+ years ago contained lye, and lye absolutely will strip seasoning from cast iron. That's not a myth - that's chemistry.
Modern dish soap does not contain lye. Dawn won't strip a well-maintained seasoning. Will it affect the surface slightly over time? Yes - which is exactly why I reseason after almost every cook. The reseason takes 60 seconds on the stovetop. It's not extra work. It's the system.
I don't subscribe to the "salt and a scrub brush, no soap ever" approach. I think that advice exists partly to sell cast iron cleaning products. Here's my practical problem with it: flavors live in fats. If you don't wash the cooking fat off the surface, your pan smells and tastes like whatever you cooked last. I don't want my pancakes tasting like garlic. I don't want my eggs carrying cajun seasoning from last night's chicken.
A salt-scrubbed pan might be sanitary. But a soap-washed, reseasoned pan is sanitary AND flavor-neutral. That matters when you're cooking multiple different meals in the same pan across a week - which is exactly what batch cooking demands.
The actual routine: Scrubby pad, a drop of Dawn, warm water. 60-90 seconds. Rinse. Back on the stove to dry and reseason. Done.

Cast Iron Maintenance - The Complete Care System
Everything about cast iron care comes down to three things: keep it dry, keep it seasoned, keep it out of the dishwasher.
After every cook:
- Let the pan cool on the stove while you eat. Don't splash cold water on a screaming hot pan - it can warp, crack, or create steam burns.
- Once cool enough to handle (doesn't need to be cold - just manageable), wash with warm water, a scrubby pad, and a drop of Dawn.
- Dry immediately. Don't air dry. Back on the stove over high heat for 60 seconds to evaporate all moisture. Rust starts with water left standing, not with cooking.
- While still hot: thin coat of beef fat or tallow, wiped over the entire surface with a thick paper towel fold. Leave on heat until fat starts to smoke. Kill the heat. Let it cool on the stovetop.
- It's ready for the next meal.
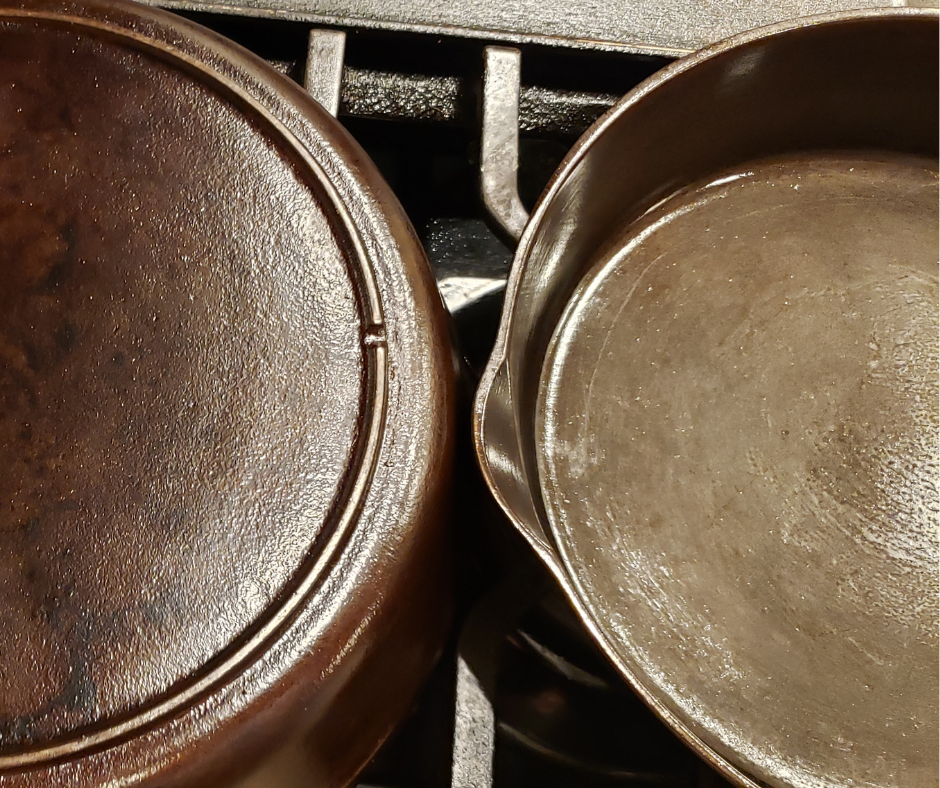
Storage: I keep 4 cast iron pans on my stove at all times - an 8-inch, 10-inch, 9-inch, and 6-inch. The large 12-inch stays in the oven. They live where they work. If you're stacking cast iron in cabinets, place a paper towel between pans to absorb moisture and prevent scratching. Make sure the shelf can handle the weight - these are heavy.
Occasional deep care: Oil the bottom and outside of the pan periodically to prevent rust spots from developing where water collects during washing.

How to Solve Common Cast Iron Cookware Problems
Troubleshooting Cast Iron Problems
Every cast iron problem has a fix. Here's what you'll actually run into:
Food sticking: Two causes, almost every time. Either your pan isn't seasoned enough, or you're cooking too hot. Cast iron gives you a natural nonstick surface IF the seasoning is built up and the heat is managed. Start with a hot pan, add cold fat, let the fat absorb for a moment, then add food. Once food goes in, leave it alone - some proteins will stick initially and release when the surface finishes cooking. If you nudge it and it doesn't move, give it more time. If it slides with a gentle nudge, it's ready to turn.
Here's the proof: when I threw all the Teflon-coated pans in the garbage and switched the family to cast iron, eggs were the battleground. My daughter struggled at first - everyone does. She actually learned to cook eggs in stainless steel first (which is a harder surface to master for eggs than cast iron). But once the cast iron seasoning built up, she came back to it. Now she chooses cast iron over stainless for eggs every time. If a teenager can figure this out, you can too.
Gummy, sticky surface: Seed oils. Almost guaranteed. Vegetable oil, canola oil, and soybean oil don't polymerize into a clean hard finish - they leave a tacky residue that builds up over time. The fix: scrub the sticky layer off with a copper scrub pad under warm water, then reseason with beef fat or tallow. The prevention: stop using seed oils on cast iron, permanently.
Rust spots: Minor surface rust comes off with a copper scrub pad and a stovetop reseason. If it's deep rust, strip the pan completely with Easy-Off oven cleaner, clean down to bare cast iron, and reseason from scratch. Rust means moisture sat on unprotected iron - fix your drying and reseasoning routine.
Burnt butter: You're cooking too hot. Cast iron's carryover heat turns butter from golden to black in seconds if the pan is above medium. Turn the heat down before you think you need to. The pan is hotter than the dial says.
Metallic taste from acidic foods: Tomatoes, vinegar, citrus - all of these will eat through seasoning if cooked too long in under-seasoned cast iron. Don't cook acidic foods in regular cast iron. Transfer to stainless steel or use enamel-coated cast iron instead. (More on this in the next section.)
Uneven or blotchy seasoning: Normal, especially on newer pans. Keep cooking. The surface evens out over time. Blotchy doesn't mean broken.
Warping or cracking: Almost always from extreme thermal shock - cold water on a scorching pan, or sustained extreme heat. These are rare and preventable. Let pans cool before washing. Don't crank to maximum heat and leave unattended.
Enamel-Coated Cast Iron - The Acid-Cooking Bridge
Regular cast iron and acidic foods don't mix. Tomatoes, vinegar, BBQ sauce, wine reductions - all of them will attack your seasoning and can leave a metallic taste in the food. That's not a flaw in cast iron. It's a design boundary.
Enamel-coated cast iron solves this completely. The enamel coating protects the iron from acidic ingredients while preserving the two properties that make cast iron great: even heat distribution and superior heat retention.
Where enamel-coated cast iron earns its place:
Marinara sauce. BBQ beans. Brunswick stew. Any braise or soup that involves tomatoes, wine, or vinegar as a primary ingredient. The enamel handles the acid, and the cast iron body holds heat for hours - which is exactly what low-and-slow recipes need. Sugar caramelizes beautifully. Beans cook until perfectly tender.
My actual workflow with acid: I sear proteins in regular cast iron for the browning and crust. Then I transfer to stainless steel or enamel-coated cast iron to add the acidic components - tomato sauce, BBQ sauce, vinegar-based liquids. The cast iron does the flavor work up front; the enamel or stainless protects the finish and prevents metallic taste.
I use stainless steel for seafood across the board. I use stainless or enamel for any recipe where vinegar, BBQ sauce, or tomatoes are going to simmer for more than a few minutes.
The one limitation of enamel: You can't season it like regular cast iron, so it's not nonstick in the same way. And avoid metal utensils on the enamel surface - use silicone, wood, or nylon to keep the coating smooth. Most enamel pans also have an exposed cast iron rim on the lid that can rust if not dried properly.
My Collection - And How to Build Yours Strategically
You can get carried away collecting cast iron. They're beautiful, they're durable, and every estate sale has a pan with a story. But they're also heavy and bulky, and your kitchen has limits. Buy strategically.
What lives on my stove (permanently):
Four pans: 8-inch, 10-inch, 9-inch (Griswold), and 6-inch. The 12-inch stays in the oven. These cover every daily cooking need from eggs to batch searing.
Two of these pans carry history. One is my late mother's - the first pan I ever cooked in. The 9-inch is a vintage Griswold #6, a Christmas gift from a friend at work named Justin. I refinished and re-seasoned it, and the bottom is as smooth as glass. It's one of my best performers and I think of Justin every time I use it. That's the thing about cast iron - it carries more than food.
The full collection: Multiple Lodge pans in various sizes. A cornbread pan that forms corn-on-the-cob shaped sticks - and yes, my cornbread recipe is made in that pan and the 10 inch pan. Dutch ovens. Fajita platters that serve double duty: they keep food hot at the table and slowly continue searing while you eat. Onions and peppers caramelize, meats stay hot and develop more crust. They can be dangerous (sizzling cast iron at the dinner table demands respect) but they're incredibly effective as a serving vessel. Enamel-coated Dutch ovens for the acidic cooking I described above. Plus a stainless steel set, stoneware, and Corning Ware - because cast iron doesn't do everything, and anyone who tells you otherwise is selling something.
The vintage vs. modern question:
Vintage cast iron (Griswold, Wagner, and others from 75+ years ago) was milled smooth on the cooking surface. The finish is like glass and it seasons into an extraordinary cooking surface. These pans are highly sought after by collectors and can be expensive.
Modern cast iron (Lodge and similar manufacturers) has a rougher, more textured surface from the factory. It's not as smooth out of the box, which means it requires a little more skill and attention to get the same nonstick results. But it's high quality, made in the USA, and perfectly capable of producing great food.
Think of it like cars. Lodge is a Toyota - reliable, gets you where you need to go, excellent value. The smooth-milled boutique brands (Smithey, Butter Pat, Lancaster) are the BMW - superior finish, premium price, noticeable difference if you care about that. Le Creuset? That's the Ferrari. High quality, beautiful, but mostly a statement piece beyond what the typical family needs.
If you have the budget, go for smooth-milled. If you don't, Lodge will give you a quality cook. Either way, if you maintain the cookware, you'll hand it down for generations. The seasoning should be phenomenal by then.
You can also strip and refinish a Lodge pan to remove the factory texture and reseason the raw iron with tallow. It's work, but the results are worth it if you want a smoother cooking surface without the boutique price. I use Easy-Off oven cleaner to strip cast iron down to bare metal before reseasoning.
The Cast Iron + Hotel Pan Workflow
Here's where cast iron meets crowd cooking.
For small groups (4-8 people), cast iron goes from stovetop to oven to table. The heat retention keeps food warm during the meal, and you're serving directly from the cooking vessel. One pan, zero transfers.
For larger groups, cast iron is still your quality tool - you just add a handoff step. I'll blacken chicken thighs in cast iron to get the crust and color, then transfer those thighs into a hotel pan with rice, broth, and seasonings to finish in the oven. The cast iron delivers the sear. The hotel pan delivers the volume and the hold.
For items like steaks, eggs, or French toast where you need the cast iron cooking surface but you're feeding more than one pan can handle, I cook in small batches in cast iron and transfer to hotel pans for holding and serving. The cast iron does the skill work. The hotel pans do the logistics.
In professional kitchens, most of the work a cast iron pan does at home is done on a 36-inch flat steel griddle - which is essentially a massive cast iron affect surface. Same principles, different scale.
For crowd-scale serving and hold systems, see the Crowd Cooking 101 guide.
All Cast Iron Recipes
Every recipe on BatchAndGather that's built for cast iron - from cornbread to seared steaks to one-pan batch meals. If it goes in the skillet, it's here.
- Taco Stuffed Peppers - 20-Minute Assembly Meal
- Taco Cheese Skillet Dip - 20-Minute Party Appetizer
- Beef Quesadillas - Restaurant Method in 15 Minutes
- Garlic Sautéed Zucchini - Restaurant Sauté Technique
- Sweet & Tangy Meatballs - 15-Min Party Food from Freezer
- Sausage Apple Cranberry Cornbread Dressing - Quick Assembly
- French Bread Dressing - Holiday Cast Iron Method
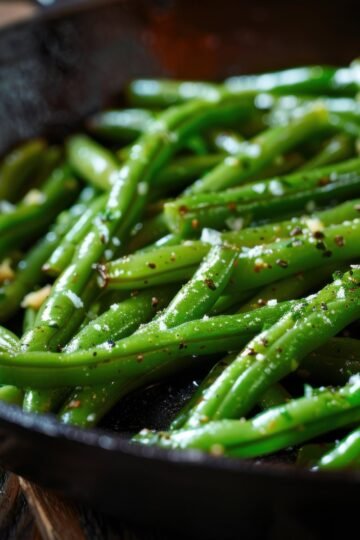
- French Green Beans - Restaurant Sauté Technique
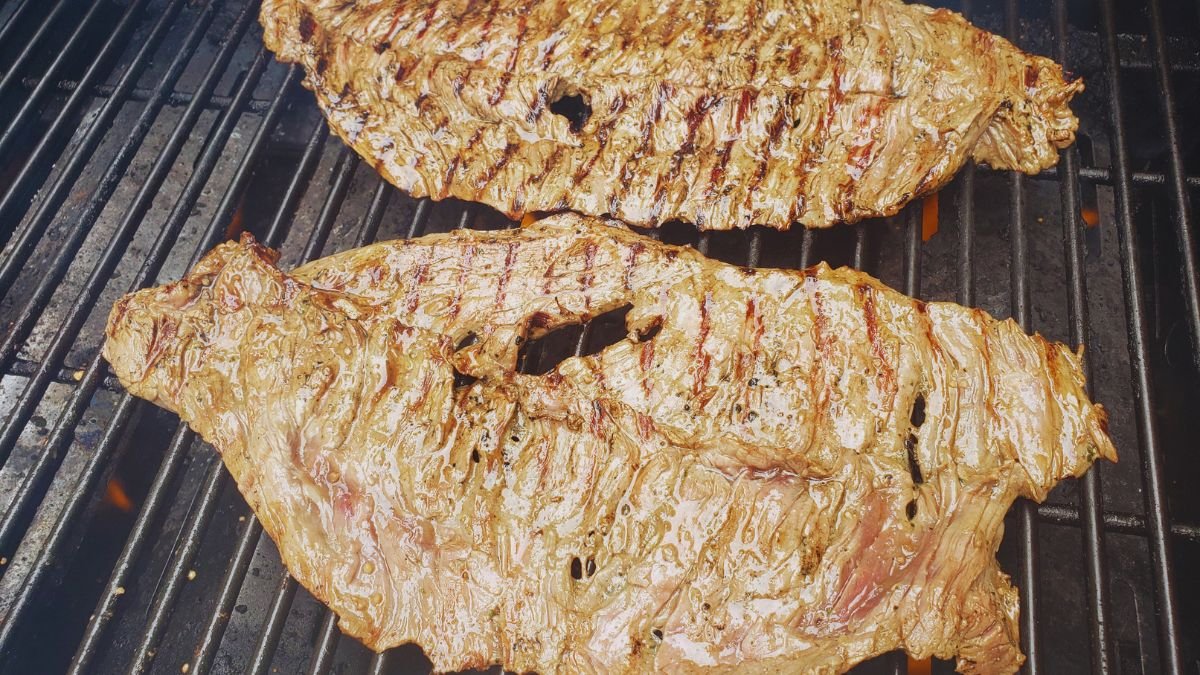
- Batch Grilled Skirt Steak - 10 Fajita Dinners Ready
- Sawmill Gravy - Rich Sausage Gravy for Biscuits
- Batch Blackened Chicken Thighs - 12 Portions Ready
- Spanish Chicken Rice - 25-Minute Dinner from Freezer


Get the System, Not Just the Pan
A great skillet doesn't help if you're still cooking from scratch every night. Cast iron is one piece of the batch cooking system - the piece that makes searing, browning, and building flavor faster and better than anything else in your kitchen. If you're ready to see how all the pieces connect, start with Batch Cooking 101.