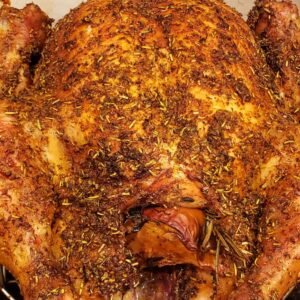
Herb Roasted Chicken
Equipment
- Large Pot
- Sheet Pan
- Wire Rack
- Small bowl
- Roasting pan
- Roasting rack
- Probe thermometer
- Aluminum foil
- Cutting Board
- Chef’s knife
Ingredients
Dry Brine
- 1 Tbsp Kosher Salt Morton brand
- 1 ½ tsp Brown Sugar dark
- ½ tsp Black Pepper coarse ground
- ½ tsp Garlic Powder
- ¼ tsp Onion Powder
- ¼ tsp Smoked Paprika
Chicken
- 1 whole Chicken 5 lb fryer
Aromatics (for the cavity)
- ½ Apple quartered
- ½ Onion quartered
- 1 sprig Rosemary fresh
- 1 sprig Thyme fresh
- 1 sprig Sage fresh
For Roasting
- 1 Tbsp Butter softened, for skin
- 1 cup Chicken Stock for roasting pan
Instructions
Dry Brine
- Remove the chicken from packaging 24-48 hours before roasting.
- Remove anything packed inside the cavity.
- Pat completely dry with paper towels.
- Combine kosher salt, brown sugar, black pepper, garlic powder, onion powder, and smoked paprika in a small bowl.
- Work your fingers gently under the breast skin to create pockets without tearing.
- Apply about 60% of the brine mix directly on the meat under the skin.
- Apply the remaining 40% over the outside — breast, legs, thighs, back.
- Press it in.
- Rub inside the cavity lightly with any remaining brine.
- Place the chicken on a wire rack over a sheet pan.
- Refrigerate uncovered for 24-48 hours.
Roasting Day
- Remove the chicken from the fridge 45-60 minutes before cooking.
- Place the apple, onion, rosemary, thyme, and sage in the cavity.
- Rub softened butter over the entire skin.
- Place the chicken on a roasting rack in a roasting pan.
- Pour chicken stock into the bottom of the pan.
- Insert a probe thermometer into the thickest part of the breast from the neck end, going under the skin.
- Roast at 425°F for 20 minutes to crisp the skin.
- Reduce heat to 325°F and continue roasting for 18-20 minutes per pound total cooking time.
- For crispy skin, cook to 165°F in the oven and do not tent when you remove it.
- For moist meat with softer skin, pull at 155-160°F, tent immediately with foil, and rest 15-20 minutes until temperature reaches 165°F.
Rest and Serve
- Carve and serve.
Notes
Why Batch Herb Roasted Chicken
It's 6 PM on a Wednesday. You're tired, decision-fatigued, and staring into your refrigerator hoping inspiration strikes. It won't. But if you open your freezer and see vacuum-sealed portions of herb-roasted chicken from three weeks ago, you're twenty minutes from a complete dinner. Thaw overnight, reheat in the oven while rice cooks, steam some vegetables, and you've just served a meal that tastes like you had your act together. With precooked herb roasted chicken, it's not just for all-day Sunday cooking sessions anymore. You can roast several chickens on a Sunday or whatever day you batch cook, vacuum seal the portions, freeze them, and have restaurant-quality roasted chicken ready any night of the week without going through the trouble of roasting a chicken that same night.
A whole roasted chicken gives you everything: white meat for salads and sandwiches, dark meat for tacos and rice bowls, and if you save the carcass, stock for next month's soup. You're not meal prepping containers of sad chicken breast. You're stocking your freezer like a professional kitchen stocks their walk-in-with versatile, properly cooked chicken ready to become anything.
The Restaurant Method
Professional kitchens don't roast chickens to order during dinner service. They roast in batches during prep shifts, break them down properly, and store portions for quick assembly when tickets come in. The technique is simple: dry brine for moisture retention, stuff the cavity with aromatics that perfume the meat from inside, and roast until the breast hits 155°F while the thighs reach 165°F. Then comes the critical step most home cooks skip-letting it rest fully before breaking it down into clean portions.
What Makes This Worth the Time
Whole chickens are the most economical chicken you'll buy-often under $1.50/lb at warehouse clubs versus $3-4/lb for individual breasts or thighs. But the real advantage is cooking the entire bird together. The dark meat bastes the white meat as it roasts. The cavity aromatics steam up through the meat. The skin protects everything from drying out. When you portion it after roasting, you're getting restaurant-quality texture that reheats beautifully because it was cooked properly the first time. Vacuum sealing locks in that moisture, so reheating doesn't turn it into dry, sad leftovers-it tastes like you just carved it.
Time Investment & Meal Yield
Here's the honest math on what you're building with one Sunday afternoon.
What You're Actually Building
- Active prep: 30 minutes (mix dry brine, prep cavity aromatics, truss birds)
- Passive cooking: 3 hours in oven (you're watching TV or doing laundry)
- Rest time: 15 minutes (mandatory-don't skip this)
- Portioning & sealing: 20 minutes (break down birds, vacuum seal portions, label with date)
- Result: 8 portions = 6-8 complete meals over the next 3 months
The Real-World Timeline
You'll use two portions this week for quick dinners-maybe chicken and rice one night, chicken Caesar salad another. Another portion goes into chicken tacos next week. Two more become fried rice or grain bowls the week after. The remaining portions sit in your freezer for that inevitable evening when you forgot to plan dinner and refuse to order delivery again. Spread over two months, that afternoon investment becomes six separate decisions you don't have to make when you're already exhausted.
Storage & The Freezer Reality
Let's address the concern directly: "But it's been frozen for weeks." So what? That frozen pizza in your freezer right now sat in the manufacturer's warehouse freezer for weeks, then the distributor's freezer for weeks, then the grocery store freezer for more weeks. It's expected to sit in your freezer for months. Your vacuum-sealed chicken portions are fresher than anything in the "fresh prepared foods" section at the grocery store, and they'll stay that way.
Why Vacuum Sealing Changes Everything
- Flat storage: Portions stack efficiently in your freezer, no playing Tetris with round containers
- Fast thawing: Flat bags thaw overnight in the fridge, or quick-thaw in cold water in 30 minutes
- Zero freezer burn: Properly sealed = 3-6 month freezer life with no quality loss
- Professional standard: This is exactly how restaurants store prepped proteins between prep day and service
The Commercial Food Comparison
That rotisserie chicken at the grocery store has been sitting under heat lamps for hours, drying out and growing bacteria. Those "fresh" prepared meals in the deli section were made days ago. Your vacuum-sealed portions are fresher, safer, and taste better because you controlled every step-from seasoning to storage. You're using professional food storage methods that preserve quality better than anything you can buy ready-made.
Cost Breakdown
Let's run the actual numbers on what this batch costs versus what you'd pay for equivalent restaurant meals.
Batch Cost Calculation
Ingredients breakdown:
- Whole chicken: 5 lbs × $1.49/lb = $7.45
- Dry brine ingredients (salt, pepper, herbs): $1.50
- Aromatics (onion, garlic, lemon, thyme): $2.00
- Butter and chicken stock: $1.50
- Total batch cost: $12.45
- Portions created: 8 (approximately 4-5 oz each)
- Cost per portion: $12.45 ÷ 8 = $1.56 per portion
The Savings Add Up
Per-meal comparison:
- Homemade portion: $1.56 (protein only)
- Rotisserie chicken at grocery store: $8-10 (same yield, lower quality, sitting under heat lamps)
- Restaurant roasted chicken dinner: $15-19 per plate
- Savings per meal: $17 - $1.56 = $15.44 (versus restaurant dinner)
- Total batch savings: $15.44 × 8 portions = $123.52 saved versus eating out
Even if you only compare it to buying rotisserie chickens when you need them, you're saving $6-8 per equivalent amount while getting better quality and complete control over seasoning and storage. The chicken you're buying is fresher, the cooking method produces superior texture, and you're not paying for grocery store convenience markup.
Using This Component
Here's how vacuum-sealed chicken portions become actual Tuesday night dinners without any drama.
Quick Assembly Meals
- Chicken Rice Bowls: Thaw overnight, reheat while rice cooks, top with quick-pickled vegetables and sriracha mayo-20 minutes total
- Chicken Tacos: Quick-thaw in cold water, shred and crisp in a skillet with taco seasoning, serve with store-bought salsa and tortillas-25 minutes
- Chicken Caesar Salad: Thaw overnight, slice cold over romaine with store-bought dressing and croutons-15 minutes
- Chicken Fried Rice: Dice frozen and toss directly into hot pan with day-old rice, frozen vegetables, soy sauce-20 minutes
- Chicken and Vegetables: Thaw the night before, reheat in the oven alongside roasted potatoes and steamed broccoli-your classic roasted chicken dinner without the hassle
This is how you stock a professional kitchen at home. You're not batch cooking to eat the same meal for a week. You're creating infrastructure-versatile chicken portions that become different dinners depending on what you need. One Sunday afternoon of roasting gives you two months of Tuesday nights when you're too tired to think but still want to eat well. That's the entire point.
Recipe
Herb Roasted Chicken
Equipment
- Large Pot
- Sheet Pan
- Wire Rack
- Small bowl
- Roasting pan
- Roasting rack
- Probe thermometer
- Aluminum foil
- Cutting Board
- Chef's knife
Ingredients
Dry Brine
- 1 tablespoon Kosher Salt Morton brand
- 1 ½ teaspoon Brown Sugar dark
- ½ teaspoon Black Pepper coarse ground
- ½ teaspoon Garlic Powder
- ¼ teaspoon Onion Powder
- ¼ teaspoon Smoked Paprika
Chicken
- 1 whole Chicken 5 lb fryer
Aromatics (for the cavity)
- ½ Apple quartered
- ½ Onion quartered
- 1 sprig Rosemary fresh
- 1 sprig Thyme fresh
- 1 sprig Sage fresh
For Roasting
- 1 tablespoon Butter softened, for skin
- 1 cup Chicken Stock for roasting pan
Instructions
Dry Brine
- Remove the chicken from packaging 24-48 hours before roasting.
- Remove anything packed inside the cavity.
- Pat completely dry with paper towels.
- Combine kosher salt, brown sugar, black pepper, garlic powder, onion powder, and smoked paprika in a small bowl.
- Work your fingers gently under the breast skin to create pockets without tearing.
- Apply about 60% of the brine mix directly on the meat under the skin.
- Apply the remaining 40% over the outside - breast, legs, thighs, back.
- Press it in.
- Rub inside the cavity lightly with any remaining brine.
- Place the chicken on a wire rack over a sheet pan.
- Refrigerate uncovered for 24-48 hours.
Roasting Day
- Remove the chicken from the fridge 45-60 minutes before cooking.
- Place the apple, onion, rosemary, thyme, and sage in the cavity.
- Rub softened butter over the entire skin.
- Place the chicken on a roasting rack in a roasting pan.
- Pour chicken stock into the bottom of the pan.
- Insert a probe thermometer into the thickest part of the breast from the neck end, going under the skin.
- Roast at 425°F for 20 minutes to crisp the skin.
- Reduce heat to 325°F and continue roasting for 18-20 minutes per pound total cooking time.
- For crispy skin, cook to 165°F in the oven and do not tent when you remove it.
- For moist meat with softer skin, pull at 155-160°F, tent immediately with foil, and rest 15-20 minutes until temperature reaches 165°F.
Rest and Serve
- Carve and serve.
Was this helpful?
You must be logged in to post a comment.