Batch Marinated Grilled Chicken Breasts
Equipment
- Grill
- Oven
- Large Bowl
- Wire Rack
- Sheet Pan
- Paper Towels
- Small bowl
- Probe thermometer
- Dutch Oven
- Hotel Pan
- Foil
- Storage Bags
Ingredients
Dry Brine
- 2 Tbsp Kosher Salt Morton brand
- 1 Tbsp Brown Sugar dark
- 1 tsp Black Pepper coarse ground
- 1 tsp Garlic Powder
- ½ tsp Onion Powder
- ½ tsp Smoked Paprika
Chicken
- 6 lb Chicken Breasts boneless, skinless, trimmed
For Grilling
- 2 Tbsp Avocado Oil for grill grates
Instructions
Dry Brine
- Pat the chicken breasts completely dry with paper towels.
- Combine kosher salt, brown sugar, black pepper, garlic powder, onion powder, and smoked paprika in a small bowl.
- Season the breasts on all sides, pressing the brine into the meat.
- Place on a wire rack over a sheet pan.
- Refrigerate uncovered for 24-48 hours.
Grill
- Remove the chicken from the fridge 30-45 minutes before grilling to take the chill off.
- Preheat the grill to medium.
- Oil the grates with avocado oil.
- Preheat oven to 350°F.
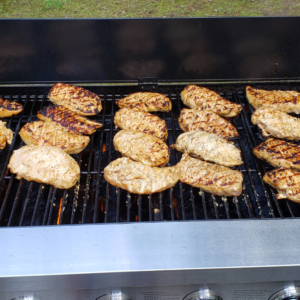
- Grill the breasts for 4-6 minutes per side.
- Turn 90 degrees halfway through each side for crosshatch grill marks.
Oven Finish
- Transfer the grilled breasts to a Dutch oven or hotel pan.
- Cover with a lid or foil.
- Insert a probe thermometer into the thickest breast.
- Bake at 350°F until the internal temperature reaches 165°F.
Rest and Serve
- Remove and let rest covered for 30 minutes.
Notes
Why Batch Grilled Chicken Breasts
It's 6 PM on a Wednesday. You've got nothing defrosted, everyone's hungry, and cooking raw chicken from scratch means 45 minutes minimum-trimming, seasoning, waiting for the grill to heat, managing temperatures, cleaning up. Or you could pull a vacuum-sealed portion from your freezer, reheat it in a skillet in 12 minutes while rice cooks, and serve restaurant-quality chicken with zero stress. This is the Tuesday night scenario that batch cooking solves. You're trading two focused hours on a weekend for twelve weeknight victories over the next month.
I love grilled chicken, but let's be honest-it's not always practical to fire up the grill. Rain, cold weather, late nights after work when the last thing you want is to stand outside monitoring temperatures. With this batch component, you can have that smoky, charred grilled flavor anytime. I'll cook a lot at once and vacuum seal it for the freezer, and it's quietly saved countless weeknight dinners when grilling just isn't happening.
The Restaurant Method
Professional kitchens don't cook chicken breasts to order from raw-they'd never keep up with service. They pre-cook proteins in batches during prep shifts, then finish them quickly during dinner service. The technique here is hybrid grilling: sear on the grill to develop char and smoke flavor, then finish in the oven for even cooking. This prevents the dry, overcooked exterior you get from grilling thick chicken breasts start to finish, and it's faster when you're cooking in volume.
What Makes This Worth the Time
The citrus-chipotle marinade does real work-lime juice and orange juice provide acidity that tenderizes, while chipotle in adobo adds smoke and heat that intensifies during freezing and reheating. Garlic, cumin, and oregano create a versatile base seasoning that works in tacos, salads, grain bowls, and sandwiches. Unlike wet marinades that can turn chicken mushy after freezing, this balance of acid and oil keeps the texture firm while delivering deep flavor.
You're cooking twelve chicken breasts at once-the same effort as cooking two, but you're multiplying your return. One grill session, one cleanup, twelve portions vacuum sealed and stacked flat in your freezer. This is infrastructure cooking. You're building inventory like a restaurant kitchen, not scrambling every night like a home cook.
Time Investment & Meal Yield
Here's the honest math on what you're building:
What You're Actually Building
- Active prep: 20 minutes hands-on (trimming chicken breasts, mixing marinade, coating chicken)
- Passive marinating: 2-4 hours in refrigerator (you're doing other things or prep this the night before)
- Active cooking: 45 minutes grilling and oven finishing in batches (searing, transferring to oven, monitoring temp)
- Portioning & sealing: 20 minutes (cooling, vacuum sealing individually or in pairs, labeling, dating)
- Result: 12 portions of 6-8 ounce chicken breasts = 12 complete meals over the next 4-8 weeks
The Real-World Timeline
You're not eating grilled chicken twelve nights in a row. You're pulling one portion this Thursday for chicken Caesar salad. Another portion next Tuesday for chicken tacos. Two portions the following week when you need quick protein for meal prep bowls. These portions spread across six to eight weeks, which means your two-hour Sunday investment is quietly saving you 30-45 minutes of cooking and cleanup twelve different times. That's 6-9 hours of weeknight time reclaimed.
Storage & The Freezer Reality
Let's address the concern about grilled chicken sitting in your freezer for weeks. Those frozen chicken breasts at Costco? They were processed weeks ago, frozen at the processing plant, shipped to a distribution center where they sat frozen, trucked to your local warehouse where they sat frozen longer, then you bought them and put them in your freezer. They're expected to be fine for months. Your batch-cooked grilled chicken breasts are fresher-cooked from fresh chicken breasts, immediately cooled, vacuum sealed, and frozen within hours. You've eliminated weeks of commercial storage time.
Why Vacuum Sealing Changes Everything
- Flat storage: Vacuum-sealed bags stack efficiently in your freezer, no awkward containers or freezer Tetris with bulky packages
- Fast thawing: Flat bags defrost overnight in the fridge, or you can quick-thaw in cold water in 30 minutes if you forgot to plan ahead
- Zero freezer burn: Properly vacuum sealed gives you 3-6 months of freezer life with quality that rivals fresh-cooked
- Professional standard: This is exactly how restaurants store prepped proteins-vacuum sealed, dated, stored in reach-in freezers ready for service
The Commercial Food Comparison
Frozen pizza sits in the manufacturer's freezer for weeks, then the distributor's freezer for weeks, then the grocery store's freezer for weeks, and it's expected to sit in your freezer for months. Frozen burritos, chicken nuggets, prepared meals-all the same timeline. Your batch grilled chicken breasts are higher quality than anything in the frozen food aisle because you controlled the ingredients, the marinade, and the cooking method. You're using professional food service storage methods with better ingredients than commercial products.
Cost Breakdown
Let's calculate what this batch actually costs compared to buying prepared chicken or ordering out:
Batch Cost Calculation
Ingredients breakdown:
- Chicken breasts: 6 lbs × $3.49/lb (Costco/Sam's Club boneless skinless) = $20.94
- Marinade ingredients (lime juice, orange juice, chipotle in adobo, oil, spices): $3.50
- Avocado oil for grill: $0.50
- Total batch cost: $24.94
- Portions created: 12 (6-8 ounce cooked portions)
- Cost per portion: $24.94 ÷ 12 = $2.08
The Savings Add Up
Per-meal comparison:
- Homemade portion: $2.08
- Rotisserie chicken breast portion at grocery: $4.99
- Chipotle chicken bowl (just the protein): $3.50
- Restaurant grilled chicken entrée: $14-18
- Savings per meal vs. rotisserie chicken: $4.99 - $2.08 = $2.91
- Total batch savings: $2.91 × 12 portions = $34.92 saved compared to buying rotisserie chicken twelve times
And that's just comparing to grocery store rotisserie chicken, which is the cheapest prepared option. Compare to restaurant grilled chicken and you're saving $12-16 per portion. The time you invest on Sunday returns both convenience and real money over the next two months.
Using This Component
Here's how this batch component becomes actual dinners with minimal effort on busy weeknights:
Quick Assembly Meals
- Chicken Burrito Bowls: Thaw overnight, slice and warm in a skillet 5 minutes, serve over cilantro-lime rice with black beans, salsa, and cheese-dinner in 20 minutes
- Caesar Salad with Grilled Chicken: Slice cold chicken directly onto romaine, add dressing and parmesan, faster than waiting for takeout
- Chicken Quesadillas: Dice one portion, stuff in tortillas with cheese, crisp in a skillet-kids fed in 15 minutes
- Chicken and Vegetable Stir-Fry: Slice while vegetables sauté, toss together with soy-ginger sauce over rice, 25 minutes total
- Chicken Tacos: Warm and slice, serve with tortillas, slaw, and avocado-taco Tuesday solved permanently
This is how you stock a professional kitchen at home. Cook once on Sunday, solve twelve dinners over the next two months, save $35-180 depending on your comparison point, and reclaim your Tuesday nights. You're not meal prepping-you're building restaurant-grade infrastructure that makes weeknight cooking actually manageable, rain or shine.
Recipe
Batch Marinated Grilled Chicken Breasts
Equipment
- Grill
- Oven
- Large Bowl
- Wire Rack
- Sheet Pan
- Paper Towels
- Small bowl
- Probe thermometer
- Dutch Oven
- Hotel Pan
- Foil
- Storage Bags
Ingredients
Dry Brine
- 2 tablespoon Kosher Salt Morton brand
- 1 tablespoon Brown Sugar dark
- 1 teaspoon Black Pepper coarse ground
- 1 teaspoon Garlic Powder
- ½ teaspoon Onion Powder
- ½ teaspoon Smoked Paprika
Chicken
- 6 lb Chicken Breasts boneless, skinless, trimmed
For Grilling
- 2 tablespoon Avocado Oil for grill grates
Instructions
Dry Brine
- Pat the chicken breasts completely dry with paper towels.
- Combine kosher salt, brown sugar, black pepper, garlic powder, onion powder, and smoked paprika in a small bowl.
- Season the breasts on all sides, pressing the brine into the meat.
- Place on a wire rack over a sheet pan.
- Refrigerate uncovered for 24-48 hours.
Grill
- Remove the chicken from the fridge 30-45 minutes before grilling to take the chill off.
- Preheat the grill to medium.
- Oil the grates with avocado oil.
- Preheat oven to 350°F.
- Grill the breasts for 4-6 minutes per side.
- Turn 90 degrees halfway through each side for crosshatch grill marks.
Oven Finish
- Transfer the grilled breasts to a Dutch oven or hotel pan.
- Cover with a lid or foil.
- Insert a probe thermometer into the thickest breast.
- Bake at 350°F until the internal temperature reaches 165°F.
Rest and Serve
- Remove and let rest covered for 30 minutes.
Was this helpful?
You must be logged in to post a comment.